This manual provides guidance for diagnosing and resolving issues with your Pal Pool lighting system. Addressing problems promptly ensures safe and enjoyable pool experiences.
Understanding potential remote control interference from sunlight‚ alongside electrical and fixture checks‚ is crucial for effective maintenance and repair.
Understanding Pal Pool Lighting Systems
Pal Pool lighting systems typically comprise several key components working in harmony. These include a power supply‚ often a transformer to reduce voltage for safety‚ and low-voltage wiring running to the underwater light fixtures. Many modern systems incorporate remote controls for convenient operation‚ utilizing radio frequency (RF) signals.
The lights themselves can be traditional halogen bulbs or more energy-efficient LEDs. Understanding how these components interact is vital for troubleshooting. Remote control functionality can be affected by external factors like direct sunlight or strong ambient lighting‚ disrupting the signal. Proper grounding and sealed fixtures are essential for preventing electrical hazards and corrosion‚ ensuring longevity and safe operation of your pool’s illumination.
Safety Precautions Before Troubleshooting
Before attempting any troubleshooting‚ prioritize safety! Always disconnect the power supply to the pool lighting system at the circuit breaker. Never work with electrical components while standing in water or on wet surfaces. Verify the power is off using a non-contact voltage tester.
If you are uncomfortable working with electricity‚ consult a qualified electrician. When inspecting underwater lights‚ ensure the pool pump is off. Be mindful of potential corrosion and damaged wiring. Wear appropriate personal protective equipment (PPE)‚ including rubber gloves and eye protection. Remember‚ water and electricity are a dangerous combination; proceed with caution and prioritize your well-being.
Common Pal Pool Lighting Issues
Frequently encountered problems include lights failing to illuminate‚ diminished brightness‚ or erratic on/off cycles. These issues often stem from electrical faults or fixture damage.
Light Not Turning On
A complete lack of illumination is a common issue. First‚ verify the power supply to the lighting system is active and hasn’t tripped a breaker. Check the transformer‚ ensuring it’s receiving power and outputting the correct voltage. Inspect all wiring connections for looseness or corrosion – these can interrupt the electrical flow.
If using a remote‚ confirm its batteries are fresh and there’s no interference from direct sunlight or other strong light sources‚ as this can prevent signal transmission. Finally‚ examine the bulb or LED itself; a burned-out bulb is a frequent cause. Remember safety first – always disconnect power before handling electrical components!
Dim or Flickering Lights
Dim illumination or inconsistent flickering often indicates a power supply issue. Begin by checking the transformer for proper voltage output; a failing transformer can deliver insufficient power. Inspect wiring connections for corrosion or looseness‚ as these create resistance and reduce voltage. A ground fault somewhere in the system can also cause instability.
Consider the bulb or LED – while not completely failed‚ it may be nearing the end of its lifespan. Fluctuations in the power grid can sometimes contribute to flickering. If remote-controlled‚ rule out interference from strong light sources. A multimeter can help pinpoint voltage drops along the wiring.
Lights Turning On/Off Randomly
Erratic behavior – lights switching on and off without command – frequently points to electrical instability or remote control malfunctions. First‚ examine the power supply and transformer for consistent voltage delivery. Loose wiring connections or corrosion can cause intermittent power loss. Investigate potential ground faults using a multimeter; these disrupt the electrical circuit.
If a remote control is used‚ assess for interference from sunlight or other strong light sources. A failing remote receiver could also be the culprit. Check the remote’s battery and ensure proper synchronization. Consider if recent electrical work nearby might be causing interference.
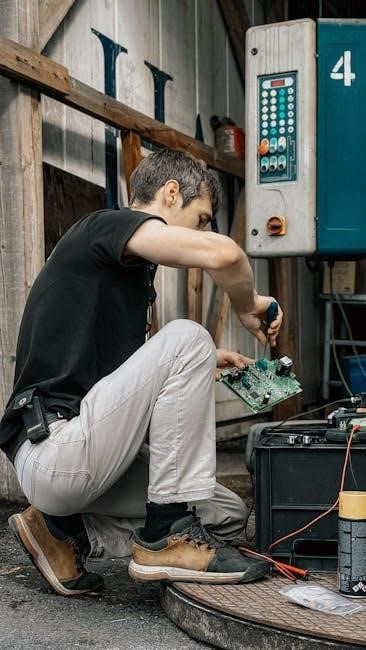
Troubleshooting Steps ー Electrical Components
Begin by verifying the power supply‚ transformer‚ and all wiring connections for proper function and secure attachments. Electrical faults are common causes.
Checking the Power Supply
Begin by confirming the power supply is receiving voltage. Use a multimeter (with extreme caution and following safety guidelines!) to test the input voltage against the supply’s specifications.
Ensure the circuit breaker dedicated to the pool lighting hasn’t tripped. Reset it if necessary‚ but investigate why it tripped before restoring power. A repeatedly tripping breaker indicates a more significant issue.
Inspect the power supply itself for any visible signs of damage – burnt components‚ swelling‚ or unusual odors. If damage is present‚ immediately discontinue use and replace the power supply; Never attempt to repair a damaged power supply yourself; it’s a safety hazard.
Verify that all connections to the power supply are tight and corrosion-free.
Inspecting the Transformer
The transformer reduces voltage to a safe level for underwater lighting. Visually inspect the transformer for any physical damage – cracks in the housing‚ signs of overheating (discoloration)‚ or oil leaks (if it’s an oil-filled type).
Carefully check all wiring connections to the transformer‚ ensuring they are secure and free from corrosion. Loose connections can cause intermittent operation or complete failure.
Using a multimeter‚ test the output voltage of the transformer. Compare the reading to the transformer’s specified output voltage. A significant deviation indicates a faulty transformer requiring replacement.
Listen for any unusual buzzing or humming sounds coming from the transformer‚ which could signal internal problems. Discontinue use if abnormal noises are detected.
Testing the Wiring Connections
Corrosion is a primary culprit in pool lighting failures; meticulously inspect all wiring connections. Begin by visually examining each connection for signs of rust‚ oxidation‚ or loose wires. Ensure all wire nuts are tight and secure‚ and that no bare wire is exposed.
With the power completely off‚ gently tug on each wire to confirm a solid connection. Use a wire brush or sandpaper to clean any corroded terminals before re-tightening;
Employ a multimeter in continuity mode to test the entire wiring path from the transformer to the light fixture. This verifies the wire isn’t broken internally.
Pay close attention to connections within junction boxes‚ as these are prone to moisture intrusion and corrosion. Replace any damaged wiring immediately.

Troubleshooting Steps ⎻ Light Fixture Itself
Inspect the fixture for damage‚ check bulb/LED functionality‚ and verify proper sealing. Addressing these components directly resolves many common pool lighting problems efficiently.
Bulb/LED Replacement
Begin by completely disconnecting power to the pool lighting system at the breaker. Always verify power is off before handling any electrical components. Carefully remove the light fixture‚ noting the existing bulb type and wattage – crucial for a compatible replacement.
For traditional bulbs‚ ensure a firm grip and twist gently to release. LED replacements often require checking for specific socket types and polarity. Install the new bulb/LED‚ ensuring it’s securely seated but not over-tightened.
Before restoring power‚ inspect the gasket and seal around the fixture. A compromised seal can lead to water intrusion and further issues. Reinstall the fixture and test functionality. If the new bulb/LED doesn’t illuminate‚ proceed to further troubleshooting steps.
Gasket and Seal Inspection
A compromised gasket or seal is a common cause of water damage and electrical issues in Pal Pool lighting. After removing the light fixture‚ thoroughly inspect the rubber gasket for cracks‚ tears‚ or deterioration. Pay close attention to areas exposed to prolonged sunlight or chemical contact.
Also‚ examine the sealing surface on both the fixture and the pool shell for any signs of damage or corrosion. A proper seal prevents water from reaching the electrical components. If the gasket is damaged‚ it must be replaced with a manufacturer-approved replacement.
Apply a thin layer of silicone-based pool sealant to the new gasket before reinstallation‚ ensuring a watertight fit. A faulty seal can lead to ground faults and necessitate more extensive repairs.
Lens and Housing Damage Assessment
Carefully inspect the light’s lens and housing for any cracks‚ chips‚ or signs of significant wear. Damage can compromise the light’s integrity‚ allowing water ingress and potentially creating a safety hazard. Look for discoloration or clouding of the lens‚ which can reduce light output.
Examine the housing for corrosion‚ particularly if the light has been installed for an extended period. Cracks in the housing can allow water to reach electrical components‚ leading to short circuits or corrosion. If damage is detected‚ the entire fixture may need replacement.
Do not attempt to repair severely damaged housings‚ as this could compromise safety. A compromised lens can also scatter light unevenly‚ reducing visibility underwater.
Remote Control Issues
Addressing remote control problems involves checking responsiveness‚ potential interference from sunlight or strong lights‚ and ensuring proper battery function for reliable operation.
Remote Control Not Responding
If your Pal Pool lighting remote control fails to respond‚ begin with a simple battery check. Replace the batteries with fresh ones‚ ensuring correct polarity. Next‚ verify there are no obstructions between the remote and the receiver unit‚ typically located near the pool’s equipment pad.
Direct sunlight or exceptionally bright lighting can significantly interfere with the remote’s signal. Attempt operation from a shaded area or during different times of the day. Confirm the receiver’s power supply is active and functioning correctly. If issues persist‚ try re-pairing the remote with the receiver‚ following the manufacturer’s instructions – often involving holding a specific button combination.
Remote Control Interference (Sunlight/Strong Lighting)
Pal Pool lighting remote controls utilize infrared (IR) technology‚ susceptible to interference from bright light sources. Direct sunlight is a primary culprit‚ overwhelming the receiver with extraneous IR radiation. Strong halogen or LED pool lights can also contribute to signal disruption.
To mitigate this‚ reposition yourself or shield the remote and receiver during operation. Try operating the remote from a shaded area or during evening hours. Reducing the intensity of nearby lights may also help. Consider the receiver’s placement; avoid direct exposure to sunlight. If interference persists‚ explore alternative control methods‚ if available‚ or contact customer support for assistance.
Remote Control Battery Replacement
A common cause of remote control failure is depleted batteries. Before undertaking more complex troubleshooting‚ always verify battery power. Most Pal Pool remotes utilize standard AAA or AA batteries – check your model’s documentation for specifics.
To replace‚ carefully open the battery compartment (usually located on the back or side of the remote). Observe the correct polarity (+ and -) when inserting new batteries. Ensure a snug fit. After replacement‚ re-test the remote’s functionality. If the remote still doesn’t respond‚ double-check battery installation and consider trying a fresh set from a different brand. Dispose of old batteries responsibly.

Advanced Troubleshooting
For persistent issues‚ utilize a multimeter to test voltage and identify potential ground faults or corrosion within the system’s electrical components.

Using a Multimeter to Test Voltage
Before commencing voltage testing‚ ensure the power to the pool lighting system is completely switched off at the breaker. Safety is paramount! Set your multimeter to the appropriate AC voltage range – typically 12V or 24V‚ depending on your system.
Carefully probe the transformer’s output terminals to verify it’s delivering the correct voltage. Then‚ test the voltage at the light fixture connection points. A reading significantly lower than expected indicates a wiring issue or a failing transformer.
Remember to always double-check your multimeter settings and connections before taking measurements. Document all readings for comparison and potential troubleshooting escalation.
Identifying Ground Faults
Ground faults pose a serious safety risk and must be addressed immediately. A ground fault occurs when electricity unintentionally flows to ground through an unintended path‚ often due to damaged wiring or a faulty fixture.
Utilize a multimeter set to resistance (Ohms) to check for continuity between the light fixture’s metal housing and the ground wire. Any reading other than infinite resistance indicates a ground fault. Inspect all wiring connections for corrosion or damage‚ as this can compromise insulation.
If a ground fault is detected‚ disconnect power and consult a qualified electrician for repair. Never attempt to repair a ground fault yourself without proper training and safety precautions.
Checking for Corrosion
Corrosion is a common culprit in Pal Pool lighting failures‚ especially in saltwater environments. It degrades electrical connections‚ leading to intermittent operation or complete failure. Regularly inspect all wiring connections‚ terminals‚ and the light fixture housing for signs of rust‚ oxidation‚ or green/white powdery buildup.
Pay close attention to underwater connections and areas exposed to moisture. Disconnect power before inspecting and cleaning corroded components. Use a wire brush or sandpaper to remove corrosion from terminals‚ followed by a corrosion-inhibiting electrical contact cleaner.
Replace severely corroded wiring or fixtures to ensure safe and reliable operation.
Preventative Maintenance
Regular cleaning and winterization are key to extending the life of your Pal Pool lighting. Proactive care prevents costly repairs and ensures optimal performance.
Regular Cleaning Schedule
Maintaining a consistent cleaning schedule is paramount for optimal Pal Pool lighting performance and longevity. At least monthly‚ inspect the light fixtures for debris accumulation – leaves‚ algae‚ or mineral deposits can significantly diminish brightness and potentially cause corrosion.
Gently wipe down the lens and housing with a soft‚ non-abrasive cloth and a mild cleaning solution specifically designed for pool equipment. Avoid harsh chemicals that could damage the fixture’s materials. Pay close attention to gaskets and seals‚ ensuring they remain intact and free from buildup. A thorough cleaning not only enhances illumination but also facilitates early detection of potential issues like cracks or corrosion‚ preventing more substantial problems down the line.
Winterizing Your Pal Pool Lighting
Proper winterization is essential to protect your Pal Pool lighting system from freeze-thaw damage. Before the first freeze‚ completely drain all water from the light fixtures. This prevents ice expansion from cracking the housing or damaging internal components.
Disconnect the power supply to the lights and‚ if possible‚ remove the bulbs or LEDs for storage in a dry location. Inspect wiring for any signs of corrosion and apply a dielectric grease to connections. Consider covering the fixtures with protective caps or wraps to shield them from the elements. Following these steps will ensure your Pal Pool lighting is ready for a bright and trouble-free start when swimming season returns.
Warranty Information & Support
Your Pal Pool lighting system is covered by a [Specify Duration] limited warranty against defects in materials and workmanship. This warranty does not cover damage resulting from improper installation‚ misuse‚ or neglect. Please retain your proof of purchase for warranty claims.
For technical support‚ troubleshooting assistance‚ or to initiate a warranty claim‚ please contact our dedicated customer support team at [Phone Number] or visit our website at [Website Address]. We also offer a comprehensive FAQ section online to address common issues. Our goal is to ensure your complete satisfaction with your Pal Pool lighting experience. Refer to the full warranty document for complete details and exclusions.